Basic Usage
There are essentially three ways to use the plugin: as a single tag, a tag pair, or the bulk tag.
Tags
Single Tag
The single tag syntax does not have a closing tag. This will automatically create an image tag for you.
Tag Pair
The tag pair syntax has a closing tag. This allows you to pass in tag data (the data between the opening and closing exp tags) to customize your HTML output.
<img src="{made}" alt="" width="{width}" height="{height}" />
{/exp:ce_img:pair}
Bulk Tag
The bulk tag parses HTML for images, and runs all of them through CE Image in bulk.
Your HTML and/or {your_custom_field} with images here.
{/exp:ce_img:bulk}
Examples
The usage of the CE Image plugin is very flexible (thanks to ExpressionEngine®), and can be used in many different ways. Here are three examples to get you started:
Example 1 - have the image element automatically created by using a single tag plugin call.
Example 2 - populate an image element by creating your own tag:
<img src="{made}" alt="" width="{width}" height="{height}" />
{/exp:ce_img:pair}
Example 3 - CSS background image:
<div style="height: {height}px; width: {width}px; background: transparent url({made}) no-repeat center center; margin-bottom: 12px;"><!-- --></div>
{/exp:ce_img:pair}
Example 4 - return only the URL of the new image:
URL: /images/made/images/example/cow_100_100_c1.jpg
URL: {made}
{/exp:ce_img:pair}
Automatic Variable Prefixing
To prefix your variables, simply add a third “tagpart” to your tag. In the example below, a third tagpart blah is added, which automatically becomes the variable prefix:
<img src="{blah:made}" width="{blah:width}" height="{blah:height}" />
{/exp:ce_img:pair:blah}
Result:
Automatic variable prefixing is advantageous, because it prevents variable conflicts when nesting CE Image tags in other EE tags, or even when nesting CE Image inside itself.
Bulk Tag In Depth
The bulk tag allows CE Image to parse HTML for images, and runs them through CE Image in bulk. Whatever parameters you pass into the ce_img:bulk tag, will overwrite the parameters of all of the images in the tagdata. The bulk tag accepts all of the parameters that the “single” tags accept, and effectively passes those parameters on to each image. The respective image’s individual style attributes are also taken into consideration, for WYSIWYG (particularly CK Editor based editors, like Wygwam) compatibility.
In other words, just make your images how you want them in your Wygwam field, wrap the field with the ce_img:bulk tag, and it will automatically take care of everything. If you want to add any parameters to each of the images, just set the parameters in the ce_img:bulk tag and it will override all of the images inside.
Using the Bulk Tag with a WYSIWYG
So let’s say you have a Wygwam field named 'my_wygwam_field', and in the backend, your client inserts a 2000px by 2000px image and scales it down to 100px by 100px in the field. Sound familiar? The image looks great, but the truth is the image is still huge and it will take forever to load.
Before
Template:
Result:
After
Template:
{my_wygwam_field}
{/exp:ce_img:bulk}
Result:
As you can see, that huge image was magically resized to 100px by 100px. Not just scaled by the browser, but actually resized. The images will now be much smaller in terms of filesize, and the page will load considerably faster.
Overriding Image Attributes with Parameters
You can easily override one or more image attributes for all of the images in a WYSIWYG field or HTML chunk. The following example would ensure that each image would be a maximum of 50px wide (this will override their width) and be grayscaled.
Template:
{my_wygwam_field}
{/exp:ce_img:bulk}
Result:
As with all CE Image tags, if the image does not need to be manipulated, it will not be manipulated. For example, if you pass in a parameter of width="100" and the image is less than or equal to 100px wide, it will not be resized, and the original image will be returned.
Overriding Image Styles
When an image has a width or height style defined, that value will be used for the image’s width= and height= parameters, unless it is overridden by the bulk tag parameter. The rule will automatically be removed from the style attribute, so that it will not conflict with the newly sized image.
You may, however, want to set or unset individual css rules in the style attribute, without changing the entire tag. You can accomplish this by setting the style attribute using the attributes= parameter. By doing so, the individual rules will cascade down and replace those of each image. Additionally, by specifying a rule property, and leaving its value empty, you will remove any rules with that property. Here’s an example:
Template:
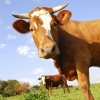
<p>A cow image resized by style: <img alt="A cow" src="/images/example/cow_square.jpg" style="width: 150px; height: 150px; border: 1px solid red; padding: 20px;" /></p>
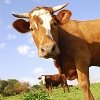
<p>A cow image with a width specified: <img alt="Same cow" filter="sepia" src="/images/example/cow_square.jpg" width="100" /></p>
<p><img src="http://maps.googleapis.com/maps/api/staticmap?center=Brooklyn+Bridge,New+York,NY&zoom=14&size=512x512&maptype=roadmap&markers=color:blue|label:S|40.702147,-74.015794&markers=color:green|label:G|40.711614,-74.012318&markers=color:red|label:C|40.718217,-73.998284&sensor=false" style="padding-left: 10px;" /></p>
{/exp:ce_img:bulk}
Result:
<p>A cow image with a width specified: <img src="/images/made/images/example/cow_square_100_100sepi_c1.jpg" alt="Same cow" width="100" height="100" style="border: 2px solid #00a6e7;" /></p>
<p><img src="/images/made/images/remote/http_maps.googleapis.com/maps/api/0f1d7b453d2765aa4d8b3f0b0f08e855/staticmap_512_512_c1.png" style="border: 2px solid #00a6e7;" width="512" height="512" alt="" /></p>
In the above example, the padding style rule was removed from any images that had it (because the padding property had no value in padding:;) as well as any descendant styles (like padding-left), and the border: 2px solid #00a6e7 CSS rule was added to each image. You can also set CE Image parameters in the actual HTML image tags, as they will be processed and removed before the final output (as is the case with the filter="sepia" on the second image above).
Note: Styles passed in through the attributes='style="..."' parameter are not taken into account before the image is processed, and are only taken into consideration after the actual image has been manipulated.
Excluding Images From Being Processed
To exclude certain images from being processed by the Bulk Tag, you can specify simple regex values via the exclude= parameter. For example, the following code would not process any images that have a src= attribute that begins with "/images", or that contain "maps.googleapis.com". You can delimit multiple values with the @ character.
{my_wygwam_field}
{/exp:ce_img:bulk}
Why Different Syntax For Single and Pair?
The truth is, the single and pair tags both do the same thing. Actually, you can call any of the following and use them as either single tags or tag pairs:
{exp:ce_img:pair}
{exp:ce_img:make}
{exp:ce_img:size}
The use of the “single” and “pair” syntax helps ExpressionEngine® to not get confused, and to keep your code always functioning as expected. When parsing your template, ExpressionEngine® looks for a closing tag for the plugin. This can be a problem in the following scenario:
{exp:ce_img:make src="{your_custom_field}"}
{!-- This is supposed to be a tag pair --}
{exp:ce_img:make src="{your_custom_field}" filter="grayscale"}
{/exp:ce_img:make}
In the above example, ExpressionEngine® would look for a closing tag for the first tag (the first highlighted line). However, it may decide to use the closing tag from the second plugin call (the second highlighted line), which would return nothing (instead of returning two image tags as expected).
To get around this, you can keep your plugin calls consistent. If you always use {exp:ce_img:single} for single tags and {exp:ce_img:pair}{/exp:ce_img:pair} for tag pair calls, ExpressionEngine® will not have any problems figuring out which plugin tags are closed, and which are meant to be standalone.