Filters
auto_sharpen
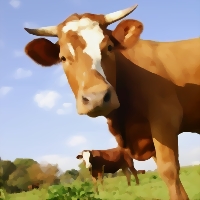
Intelligently sharpens the image automatically, depending on the manipulated image’s size compared to its original size. PHP 5.1+ is needed for this filter to work.
For increased control over image sharpening, take a look at the sharpen filter.
filter="auto_sharpen"
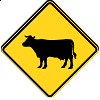
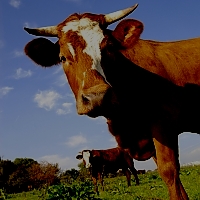
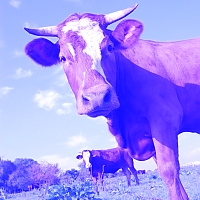
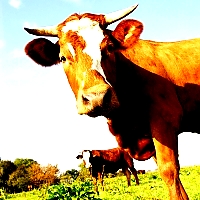
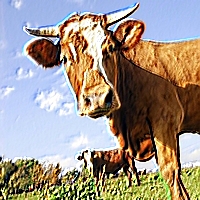
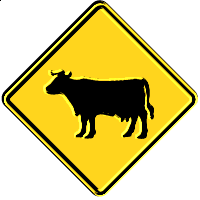
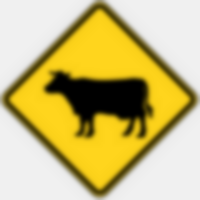
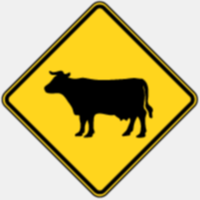
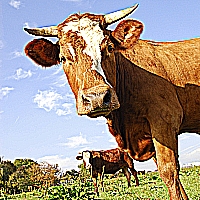
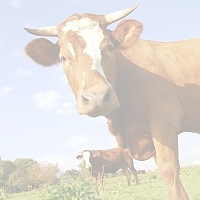
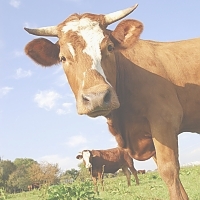
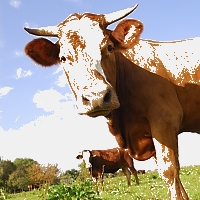
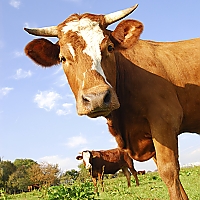
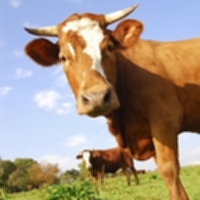
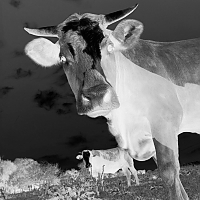
The below example has pairs of images that are cropped to various sizes. The images on the right have the auto_sharpen filter applied to them, while the images on the left do not.
{exp:ce_img:single src="/images/example/cow.jpg" max="310" crop="yes" filter="auto_sharpen"}
<br>
{exp:ce_img:single src="/images/example/cow.jpg" max="150" crop="yes"}
{exp:ce_img:single src="/images/example/cow.jpg" max="150" crop="yes" filter="auto_sharpen"}
<br>
{exp:ce_img:single src="/images/example/cow.jpg" max="50" crop="yes"}
{exp:ce_img:single src="/images/example/cow.jpg" max="50" crop="yes" filter="auto_sharpen"}


Note: Transparency may be lost when using this filter (see filter transparency for more info).
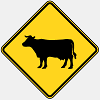
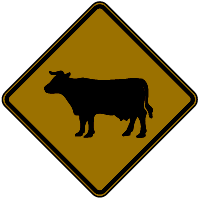
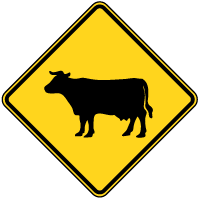
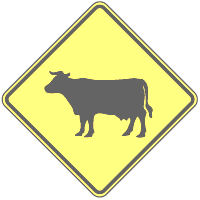
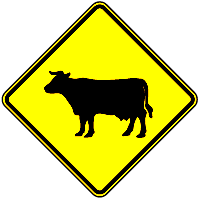
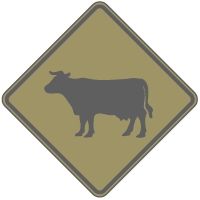
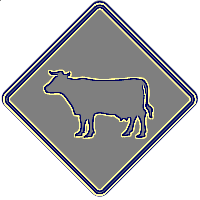
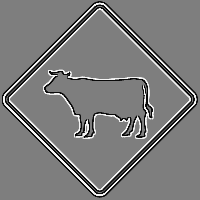
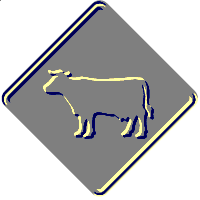
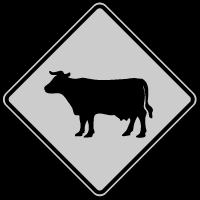
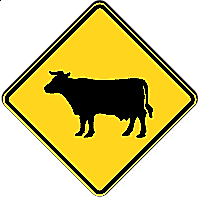
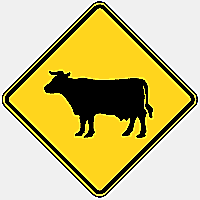
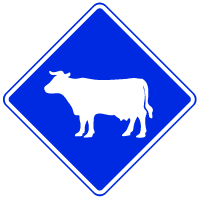
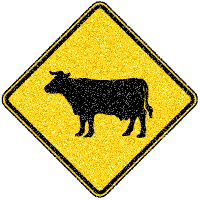
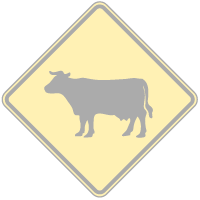
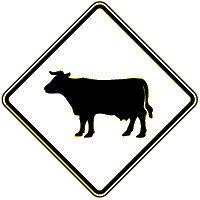
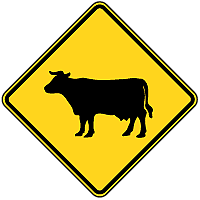
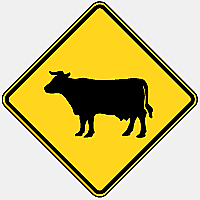
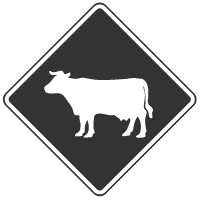
In the example below, the png images have been reduced in size. The first two images have the auto_sharpen filter applied, and the third does not. The first image shows some transparency issues. However, the issue is overcome in the second image by simply applying a background color.
{exp:ce_img:single src="/images/example/cow-sign.png" max="100" filter="auto_sharpen" bg_color="f0f0f0"}
{exp:ce_img:single src="/images/example/cow-sign.png" max="100"}

brightness
Changes the brightness of the image.
- arg1 - Brightness level (-255 = min brightness, 0 = no change, +255 = max brightness)
This filter seems to work as expected with images that have transparency.
filter="brightness,100"
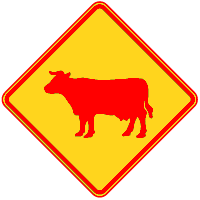
In the example below, the first column of images has a brightness of -100, the second column does not have any filters applied, and the third column has a brightness of 100.
{exp:ce_img:single src="/images/example/cow_square.jpg"}
{exp:ce_img:single src="/images/example/cow_square.jpg" filter="brightness,100"}
{exp:ce_img:single src="/images/example/cow-sign.png" filter="brightness,-100"}
{exp:ce_img:single src="/images/example/cow-sign.png"}
{exp:ce_img:single src="/images/example/cow-sign.png" filter="brightness,100"}


colorize
Like grayscale, except you can specify the color. Use arg1, arg2 and arg3 in the form of red, blue, green and arg4 for the alpha channel. The range for each color is 0 to 255.
- arg1 - Value of red component
- arg2 - Value of green component
- arg3 - Value of blue component
- arg4 - Alpha channel, A value between 0 and 127. 0 indicates completely opaque while 127 indicates completely transparent. This parameter was added in PHP version 5.2.5
This filter seems to work as expected with images that have transparency.
filter="colorize,255,0,0,0"
The image columns below show manipulation of the red, green, and blue color components respectively.
{exp:ce_img:single src="/images/example/cow_square.jpg" filter="colorize,0,255,0,0"}
{exp:ce_img:single src="/images/example/cow_square.jpg" filter="colorize,0,0,255,0"}
{exp:ce_img:single src="/images/example/cow-sign.png" filter="colorize,255,0,0,0"}
{exp:ce_img:single src="/images/example/cow-sign.png" filter="colorize,0,255,0,0"}
{exp:ce_img:single src="/images/example/cow-sign.png" filter="colorize,0,0,255,0"}
contrast
Changes the contrast of the image. Use arg1 to set the level of contrast.
- arg1 - Contrast level (-100 = max contrast, 0 = no change, +100 = min contrast (note the direction!))
This filter seems to work as expected with images that have transparency.
filter="contrast,50"
In the example below, the first column of images has a contrast of -50, the second column does not have any filters applied, and the third column has a contrast of 50.
{exp:ce_img:single src="/images/example/cow_square.jpg"}
{exp:ce_img:single src="/images/example/cow_square.jpg" filter="contrast,50"}
{exp:ce_img:single src="/images/example/cow-sign.png" filter="contrast,-50"}
{exp:ce_img:single src="/images/example/cow-sign.png"}
{exp:ce_img:single src="/images/example/cow-sign.png" filter="contrast,50"}

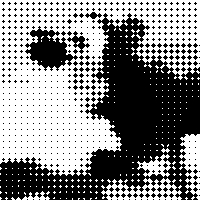
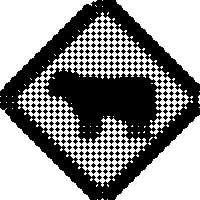
dot
Creates a dot (halftone) effect.
- arg1 - The chunk/block area size. Defaults to
6. - arg2 - An optional hexadecimal color. If no color is specified, then the dot effect will be created with the colors from the image. If a color is specified, the filter will only use that color to generate the effect. Defaults to `` (full color).
- arg3 - Dot type. Can be 'square' or simply 's' for square, or anything else for 'circle'. Defaults to
circle. - arg4 - Multiplier. Allows you to adjust the ratio size of the dots. Defaults to
1.
This filter seems to work as expected with images that have transparency.
filter="dot"
In the below example, the first column of images does not a filter applied, the second column uses the dot filter with its default settings, and the third column binds the dot filter to a color.
{exp:ce_img:single src="/images/example/cow_square.jpg" filter="dot"}
{exp:ce_img:single src="/images/example/cow_square.jpg" filter="dot,6,#000"}
{exp:ce_img:single src="/images/example/cow-sign.png"}
{exp:ce_img:single src="/images/example/cow-sign.png" filter="dot"}
{exp:ce_img:single src="/images/example/cow-sign.png" filter="dot,6,#000"}

edgedetect
Uses edge detection to highlight the edges in the image.
Note: Transparency may be lost when using this filter (see filter transparency for more info).
filter="edgedetect"
In the example below, the first column of images employs the edgedetect filter by itself, the second column has both edgedetect and grayscale filters applied, and the third column shows the images without any filters.
{!-- stacked with the grayscale filter --}
{exp:ce_img:single src="/images/example/cow_square.jpg" filter="edgedetect|grayscale"}
{exp:ce_img:single src="/images/example/cow_square.jpg"}
{exp:ce_img:single src="/images/example/cow-sign.png" filter="edgedetect"}
{!-- stacked with the grayscale filter --}
{exp:ce_img:single src="/images/example/cow-sign.png" filter="edgedetect|grayscale"}
{exp:ce_img:single src="/images/example/cow-sign.png"}
emboss
Embosses the image.
Note: Transparency may be lost when using this filter (see filter transparency for more info).
filter="emboss"
In the example below, the first column of images employs the emboss filter by itself, the second column has both emboss and grayscale filters applied, and the third column shows the images without any filters.
{!-- stacked with the grayscale filter --}
{exp:ce_img:single src="/images/example/cow_square.jpg" filter="emboss|grayscale"}
{exp:ce_img:single src="/images/example/cow_square.jpg"}
{exp:ce_img:single src="/images/example/cow-sign.png" filter="emboss"}
{!-- stacked with the grayscale filter --}
{exp:ce_img:single src="/images/example/cow-sign.png" filter="emboss|grayscale"}
{exp:ce_img:single src="/images/example/cow-sign.png"}
emboss_color
Embosses the image, preserving the image’s color.
Note: Transparency may be lost when using this filter (see filter transparency for more info).
filter="emboss_color"
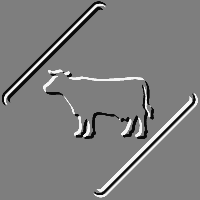
In the example below, the first column of images shows the emboss_color filter, the second column shows the images with the traditional emboss filter applied, and the third column shows the images without any filters.
{!-- original emboss filter --}
{exp:ce_img:single src="/images/example/cow_square.jpg" filter="emboss"}
{exp:ce_img:single src="/images/example/cow_square.jpg"}
{exp:ce_img:single src="/images/example/cow-sign.png" filter="emboss_color"}
{!-- original emboss filter --}
{exp:ce_img:single src="/images/example/cow-sign.png" filter="emboss"}
{exp:ce_img:single src="/images/example/cow-sign.png"}
gaussian_blur
Blurs the image using the Gaussian method.
- arg1 - The number of times to process the filter. Defaults to
1.
Note: Transparency may be lost when using this filter (see filter transparency for more info).
filter="gaussian_blur"
In the below example, the first column of images has the guassian_blur filter applied 10 times, the second has the filter applied only once, and the final column represents the images without the filter. Please notice that the example png images have a background color specified. If you do not specify a background color for images with transparency, you may get unpredictable results.
{exp:ce_img:single src="/images/example/cow_square.jpg" filter="gaussian_blur"}
{exp:ce_img:single src="/images/example/cow_square.jpg"}
{exp:ce_img:single src="/images/example/cow-sign.png" bg_color="f0f0f0" filter="gaussian_blur,10"}
{exp:ce_img:single src="/images/example/cow-sign.png" bg_color="f0f0f0" filter="gaussian_blur"}
{exp:ce_img:single src="/images/example/cow-sign.png"}


grayscale
Converts the image to grayscale. This filter seems to work as expected with images that have transparency.
filter="grayscale"
In the below example, the first column of images has the grayscale filter applied, and the second column represents the images without any filters.
{exp:ce_img:single src="/images/example/cow_square.jpg"}
{exp:ce_img:single src="/images/example/cow-sign.png" filter="grayscale"}
{exp:ce_img:single src="/images/example/cow-sign.png"}
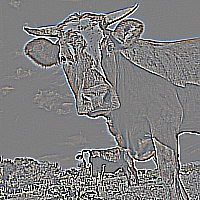
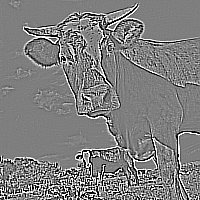
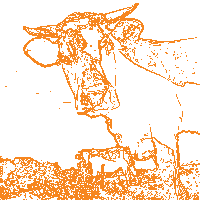
mean_removal
Uses mean removal to achieve a "sketchy" effect.
Note: Transparency may be lost when using this filter (see filter transparency for more info).
filter="mean_removal"
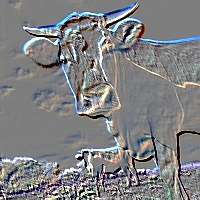
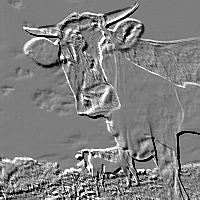
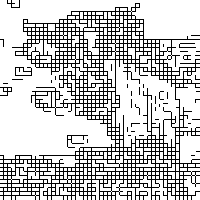
In the below example, the first column of images has the mean_removal filter applied, the second column has the filter applied and specifies a background color (notice the favorable difference in the png), and the third column represents the images without any filters.
{exp:ce_img:single src="/images/example/cow.jpg" max="200" crop="yes" filter="mean_removal" bg_color="f0f0f0"}
{exp:ce_img:single src="/images/example/cow.jpg" max="200" crop="yes"}
{exp:ce_img:single src="/images/example/cow-sign.png" filter="mean_removal"}
{exp:ce_img:single src="/images/example/cow-sign.png" filter="mean_removal" bg_color="f0f0f0"}
{exp:ce_img:single src="/images/example/cow-sign.png"}


negate
Reverses all colors of the image. This filter seems to work as expected with images that have transparency.
filter="negate"
In the below example, the first column of images has the negate filter applied, and the second column represents the images without any filters.
{exp:ce_img:single src="/images/example/cow_square.jpg"}
{exp:ce_img:single src="/images/example/cow-sign.png" filter="negate"}
{exp:ce_img:single src="/images/example/cow-sign.png"}
noise
Adds noise to the image.
- arg1 - The noise level. Defaults to
30.
This filter seems to work as expected with images that have transparency.
filter="noise"
In the below example, the first column of images do not have the filter applied, the second column have the noise filter with the default level applied, and the images in the last column have a noise level of 50.
{exp:ce_img:single src="/images/example/cow_square.jpg" filter="noise"}
{exp:ce_img:single src="/images/example/cow_square.jpg" filter="noise,50"}
{exp:ce_img:single src="/images/example/cow-sign.png"}
{exp:ce_img:single src="/images/example/cow-sign.png" filter="noise"}
{exp:ce_img:single src="/images/example/cow-sign.png" filter="noise,50"}


opacity
Sets the opacity of an image. If the image is opaque, it fakes the opacity by blending it with the background color. Use arg1 to set the opacity level.
- arg1 - The opacity level - 0 (transparent) to 100 (opaque)
filter="opacity,10"
{exp:ce_img:single src="/images/example/cow_square.jpg" filter="opacity,66" bg_color_default="#f0f0f0"}
{exp:ce_img:single src="/images/example/cow_square.jpg"}
{exp:ce_img:single src="/images/example/cow-sign.png" filter="opacity,33" bg_color="#fff"}
{exp:ce_img:single src="/images/example/cow-sign.png" filter="opacity,66"}
{exp:ce_img:single src="/images/example/cow-sign.png"}
pixelate
Applies a pixelation effect to the image. Use arg1 to set the block size and arg2 to set the pixelation effect mode.
- arg1 - Block size in pixels
- arg2 - Whether to use an advanced (more accurate) pixelation effect or not (defaults to FALSE).
Note: If you are using a version of PHP before 5.3.0, or you are running the Ubuntu GD library, the pixelate filter will not work. Don’t despair, as a custom pixelate filter is included with CE Image. To use the custom pixelate filter, simply prepend an underscore to the filter name (filter="_pixelate").
Unlike the native filter, the custom filter will always use an exact pixelation effect. Additionally, the custom filter supports transparency better than the native filter. You can elect to use the custom filter (even if you have support for the native filter) by simply prepending an underscore to the filter name (filter="_pixelate").
This filter seems to work as expected with images that have transparency.
filter="pixelate,10,TRUE"
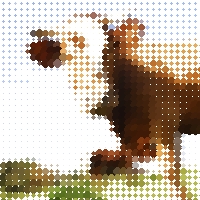
In the below example, the first column of images has the pixelate filter applied with a block size of 10px and the advanced pixelation effect enabled, and the second column represents the images without any filters.
{exp:ce_img:single src="/images/example/cow_square.jpg"}
{exp:ce_img:single src="/images/example/cow-sign.png" filter="pixelate,10,TRUE"}
{exp:ce_img:single src="/images/example/cow-sign.png"}


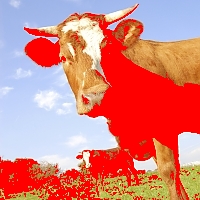
replace_colors
Allows you to replace a color (or color range), with a color or transparency. The arguments are in the form of color,replacement[,color,replacement...etc]
- argOdd - color - A color hexadecimal value (ie, #fff) or a color range (ie, #fff-#f00)
- argEven - replacement - A color hexidecimal value (ie, #fff). Leave empty to replace with transparency.
- The above arguments may be repeated.
filter="replace_colors,#fffffe-#ccc,"
{exp:ce_img:single src="/images/example/cow_square.jpg" filter="replace_colors,#999-#000,#f00"}
{exp:ce_img:single src="/images/example/cow_square.jpg"}
{exp:ce_img:single src="/images/example/cow-sign.png" filter="replace_colors,#ffffff-#ccc,"}
{exp:ce_img:single src="/images/example/cow-sign.png" filter="replace_colors,#999-#000,#f00"}
{exp:ce_img:single src="/images/example/cow-sign.png"}
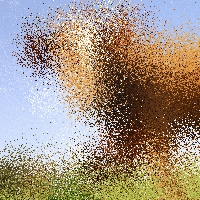
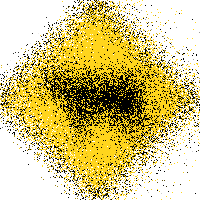
scatter
Scatters the pixels in an image.
* arg1 - The scatter level (distance). Defaults to 4.
This filter seems to work as expected with images that have transparency.
filter="scatter"
In the below example, the first column of images do not have the filter applied, the second column have the scatter filter with the default level applied, and the images in the last column have a scatter level of 15.
{exp:ce_img:single src="/images/example/cow_square.jpg" filter="scatter"}
{exp:ce_img:single src="/images/example/cow_square.jpg" filter="scatter,15"}
{exp:ce_img:single src="/images/example/cow-sign.png"}
{exp:ce_img:single src="/images/example/cow-sign.png" filter="scatter"}
{exp:ce_img:single src="/images/example/cow-sign.png" filter="scatter,15"}


selective_blur
Blurs the image.
- arg1 - The number of times to process the filter. Defaults to
1.
Note: Transparency may be lost when using this filter (see filter transparency for more info).
filter="selective_blur"
In the below example, the first column of images has the selective_blur filter applied 10 times, the second has the filter applied only once, and the final column represents the images without the filter. Please notice that the example png images have a background color specified. If you do not specify a background color for images with transparency, you may get unpredictable results.
Tip: Since the selective blur filter tends to darken images, you may consider applying a little sunshine using the brightness filter.
{exp:ce_img:single src="/images/example/cow_square.jpg" filter="selective_blur"}
{exp:ce_img:single src="/images/example/cow_square.jpg"}
{exp:ce_img:single src="/images/example/cow-sign.png" bg_color="f0f0f0" filter="selective_blur,10"}
{exp:ce_img:single src="/images/example/cow-sign.png" bg_color="f0f0f0" filter="selective_blur"}
{exp:ce_img:single src="/images/example/cow-sign.png"}


sepia
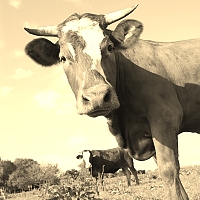
Applies a sepia tone filter to the image.
filter="sepia"
{exp:ce_img:single src="/images/example/cow_square.jpg"}
{exp:ce_img:single src="/images/example/cow-sign.png" filter="sepia"}
{exp:ce_img:single src="/images/example/cow-sign.png"}

sharpen
This filter sharpens the image using Torstein Hønsi’s excellent unsharp mask PHP script. When images are resized by PHP, they often appear a bit blurry. You can use this filter to sharpen the images to your taste. Use arg1, arg2, and arg3 in the form of amount, radius, and threshold:
- arg1 - Amount - How much of the effect you want, 100 is 'normal.' (typically 50 to 200, defaults to 80)
- arg2 - Radius - Radius of the blurring circle of the mask. (typically 0.5 to 1, defaults to .5)
- arg3 - Threshold - The least difference in color values that is allowed between the original and the mask. In practice this means that low-contrast areas of the picture are left unrendered whereas edges are treated normally. This is good for pictures of e.g. skin or blue skies. (typically 0 to 5, defaults to 3)
If you would like your images to be sharpened automatically depending on their size, take a look at the auto_sharpen filter.
This filter works alright with images that have transparency, but seems to look a little better when a background color is chosen.
Note: This filter can be process intensive (especially with versions of PHP before 5.1). However, as with the other filters, this should only be an issue if the image is not already cached.
filter="sharpen"
In the below example, the first column of images has the sharpen filter applied with the default settings (which is the same as specifying filter="sharpen,80,.5,3"), the second has the amount sub parameter doubled in value and designates a background color (notice the favorable difference in the png image), and the last column represents the images without any filters.
{exp:ce_img:single src="/images/example/cow.jpg" max_width="200" max_height="200" crop="yes" filter="sharpen,160" bg_color="f0f0f0"}
{exp:ce_img:single src="/images/example/cow.jpg" max_width="200" max_height="200" crop="yes"}
{exp:ce_img:single src="/images/example/cow-sign.png" filter="sharpen"}
{exp:ce_img:single src="/images/example/cow-sign.png" filter="sharpen,160" bg_color="f0f0f0"}
{exp:ce_img:single src="/images/example/cow-sign.png"}

smooth
Makes the image smoother. Use arg1 to set the level of smoothness.
- arg1 - Smoothness level (Applies a 9-cell convolution matrix where center pixel has the weight arg1 and others weight of 1.0. The result is normalized by dividing the sum with arg1 + 8.0 (sum of the matrix). any float is accepted, large value (in practice: 2048 or more) = no change)
Note: Transparency may be lost when using this filter (see filter transparency for more info).
filter="smooth,100"
In the below example, the first column of images has the smooth filter applied with a smoothness level of 1, the second is the same as the first but with the addition of a background color (notice the favorable difference in the png image), and the last column represents the images without any filters.
{exp:ce_img:single src="/images/example/cow_square.jpg" filter="smooth,1" bg_color="f0f0f0"}
{exp:ce_img:single src="/images/example/cow_square.jpg"}
{exp:ce_img:single src="/images/example/cow-sign.png" filter="smooth,1"}
{exp:ce_img:single src="/images/example/cow-sign.png" filter="smooth,1" bg_color="f0f0f0"}
{exp:ce_img:single src="/images/example/cow-sign.png"}


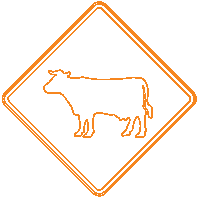
sobel_edgify
This is an edge detection filter that uses the sobel technique. This filter is very slow (but this will not be an issue after it is run the first time because it will be cached), so be cautious applying it to large images.
- arg1 - Threshold - Lower thresholds will show more lines. (0 to 255, defaults to 40)
- arg2 - Foreground Color - Hexadecimal color value (3 or 6 digits) or ''(transparent). Defaults to ''(transparent).
This filter works alright with images that have transparency, but seems to look a little better when a background color is chosen. If no background color is specified using the bg_color parameter, the background will be transparent if a png, and will default to 'ffffff' (white) if a jpg or gif. If no foreground color is specified via arg2, the foreground color will be transparent if a png and black otherwise.
Note: If you do not specify a foreground color (arg2), and do not specify a background color via the bg_color parameter, you may get a completely blank image.
Note: This filter can be process intensive (especially with versions of PHP before 5.1). However, as with the other filters, this should only be an issue if the image is not already cached.
filter="sobel_edgify"
In the below example, the first column of images has the sobel_edgify filter applied with a threshold of 40 and the f6861f foreground color with a transparent background, the second has the threshold sub parameter set to 60 in value and designates a background color with a transparent foreground, and the last column represents the images without any filters.
{exp:ce_img:single src="/images/example/cow_square.jpg" filter="sobel_edgify,60" bg_color="00a6e7" save_type="png"}
{exp:ce_img:single src="/images/example/cow_square.jpg"}
{exp:ce_img:single src="/images/example/cow-sign.png" filter="sobel_edgify,40,f6861f"}
{exp:ce_img:single src="/images/example/cow-sign.png" filter="sobel_edgify,60" bg_color="00a6e7"}
{exp:ce_img:single src="/images/example/cow-sign.png"}


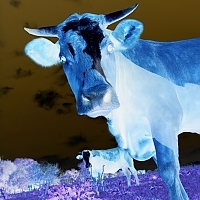
How To Apply Multiple Filters Simultaneously
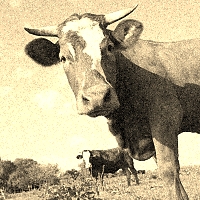
Filters can also be stacked to create cool effects! In the example below, the first column of images has two filters (grayscale and negate) applied to achieve an “x-ray” effect, the second column of images has two filters applied (pixelate, sobel_edgify), and the third column makes the images look aged by combining the noise and sepia filters.
{exp:ce_img:single src="/images/example/cow_square.jpg" filter="pixelate,4|sobel_edgify,10,#000" save_type="png"}
{exp:ce_img:single src="/images/example/cow_square.jpg" filter="noise|sepia"}
{exp:ce_img:single src="/images/example/cow-sign.png" filter="grayscale|negate"}
{exp:ce_img:single src="/images/example/cow-sign.png" filter="pixelate,4|sobel_edgify,10,#000"}
{exp:ce_img:single src="/images/example/cow-sign.png" filter="noise|sepia"}
If A Filter Does Not Work
If you pass in a filter and it does not work, your version of PHP probably does not support that filter. All filters require PHP 5+, the colorize filter needs PHP version 5.2.5 for the last argument to work (alpha level), and the pixelate filter was added as of PHP 5.3.0.
If Background Transparency Is Lost When Using Filters
Do the image alpha channels turn black or dark gray when applying filters? This can sometimes happen when applying filters to png images, depending on your PHP version and configuration. Background transparency seems to work well when using PHP versions 5.2.11 and newer.
We have tried to document which filters seem to be problematic with transparency on PHP versions before 5.2.11. In particular, these filters can sometimes cause the alpha channel to be lost: edgedetect, emboss, gaussian_blur, mean_removal, selective_blur (not completely black, just some weird artifacts around edges), and smooth. Setting the background color to be the same color as your html background color may be a work around for the following filters: gaussian_blur, mean_removal, selective_blur, and smooth.
All of the image filters should still work on images with no transparency (assuming you have the appropriate version of PHP installed for the respective filter).
Where To Learn More
See http://php.net/manual/en/function.imagefilter.php for more details on PHP image filters.